Last Updated on 12/10/2026
Unreal has Async Physic Tick which helps you to simulate physics with consistent framerate. This is great for replicating physics simulations and for better and accurate physics. Let’s see how you can implement and use Async Tick properly.
Setting it Up
Actor Component & Scene Component
Async Physic Tick is in Actor Component, Scene Component inherints from it so you can use same thing in both.
Found here (ActorComponent.h):

You can do this:
public:
virtual void AsyncPhysicsTickComponent(float DeltaTime, float SimTime) override;
void UMySceneComponent::AsyncPhysicsTickComponent(float DeltaTime, float SimTime)
{
PhysicsTickWorker(DeltaTime); //Function where you keep all your physics tasks
Super::AsyncPhysicsTickComponent(DeltaTime, SimTime); //Add this if you want it to work in Blueprints, this should be at the bottom, after your c++ code
ReceiveAsyncPhysicsTick(DeltaTime, SimTime); //This might get execute in Super, i ran my code without it and it was fine
}You need to enable Async Tick in constructor, theres this thing but it’s in private:

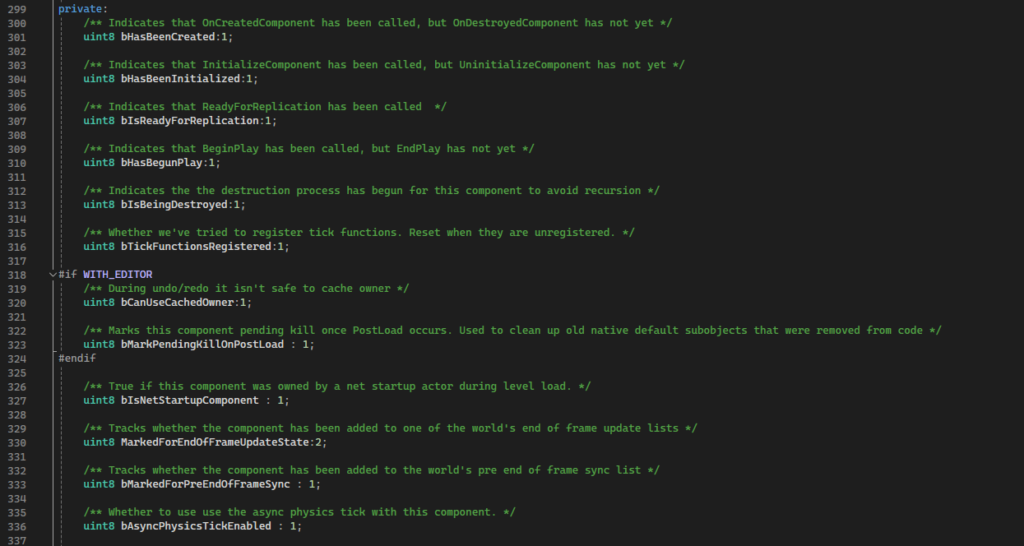
It goes here:
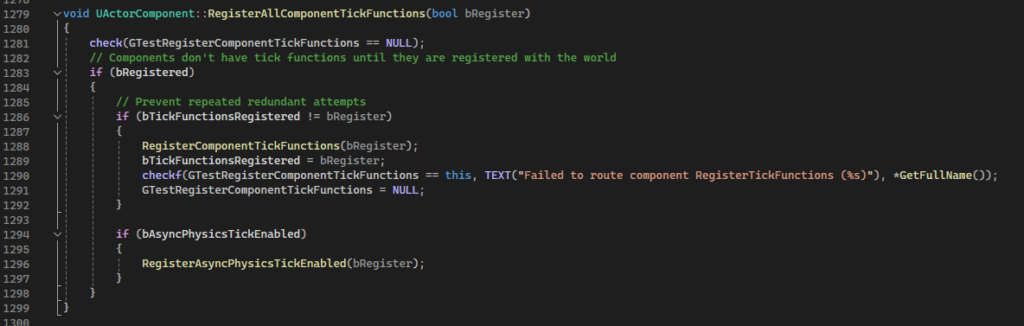
You can use this function:
I used it in construction and it was fine.
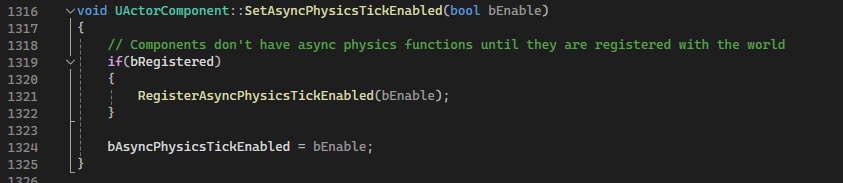
UMySceneComponent::UMySceneComponent(const FObjectInitializer& ObjectInitializer)
	: Super(ObjectInitializer)
{
	SetAsyncPhysicsTickEnabled(true);
}
Actor
Almost same thing in Actor:
public:
	virtual void AsyncPhysicsTickActor(float DeltaTime, float SimTime) override;
void AMyActor::AsyncPhysicsTickActor(float DeltaTime, float SimTime)
{
PhysicsTickWorker(DeltaTime);
Super::AsyncPhysicsTickActor(DeltaTime, SimTime);
ReceiveAsyncPhysicsTick(DeltaTime, SimTime);
}Constructor:
AMyActor::AMyActor()
{
 	// Set this pawn to call Tick() every frame.  You can turn this off to improve performance if you don't need it.
	PrimaryActorTick.bCanEverTick = true;
	PrimaryActorTick.TickGroup = TG_PrePhysics;

	bAsyncPhysicsTickEnabled = true; //You can access this in here
}
In Actor bAsyncPhysicsTickEnabled is little different:

In actor blueprint it’s this thing:
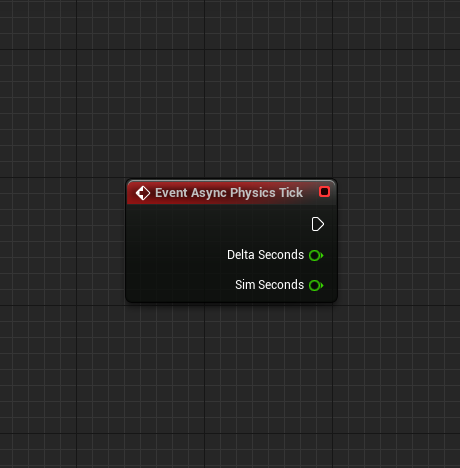
Enable it in here:
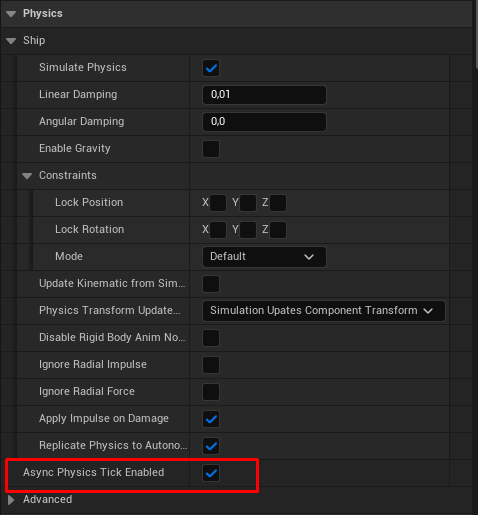
Now we just need to tinker with Async Tick Settings in Edit -> Project Settings.
Enable Tick Physics Async and set the time step.
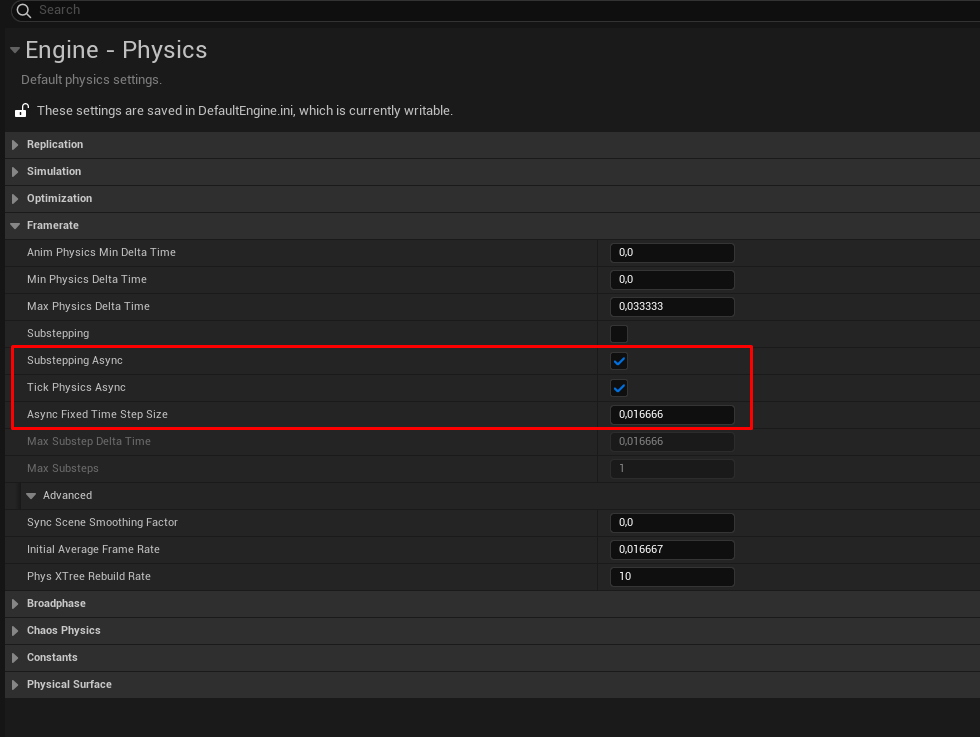
You can calculate delta time like this (in the box), 1 / 120 which means 120 frames or ticks in second.

AddForce
AddForce applies Delta Time from the main thread so using this in Async tick is the worst thing you can do.
Small physics test that shows why not use AddForce in Async tick. This test was done in 5.5.
This was simple setup, just cube flying straight up. No Gravity.
Final velocity and Travel Distance are the most important. Delta Time was not applied to Add Force, it was applied to Add Impulse.
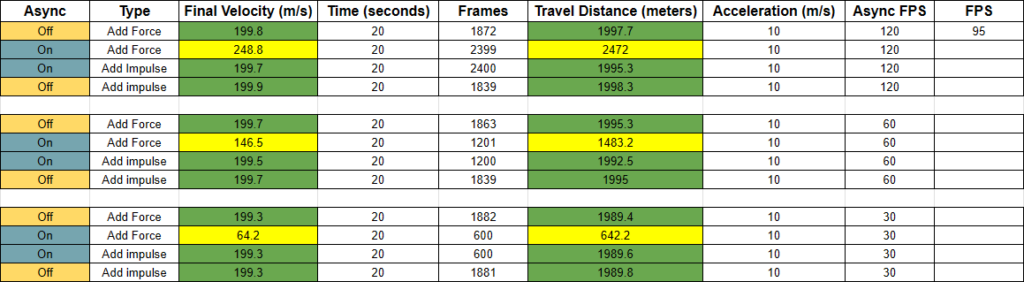
Also there’s no difference between Add Force At Location or Add Force both will give same result. Accel Change means it just includes mass into force.
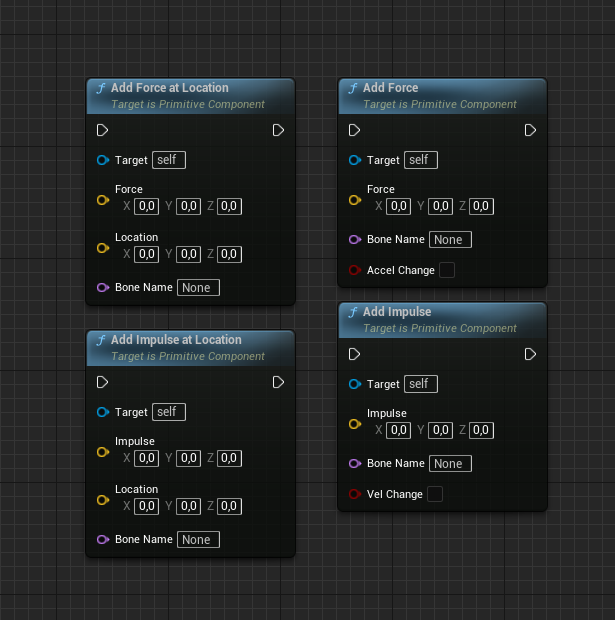
AddImpulse
AddImpulse is what you want to use in Async tick. You need to apply Delta Time of async tick into your force calculation before adding it into AddImpulse.
Remember that now you are applying acceleration.
So something like this, will work correctly:
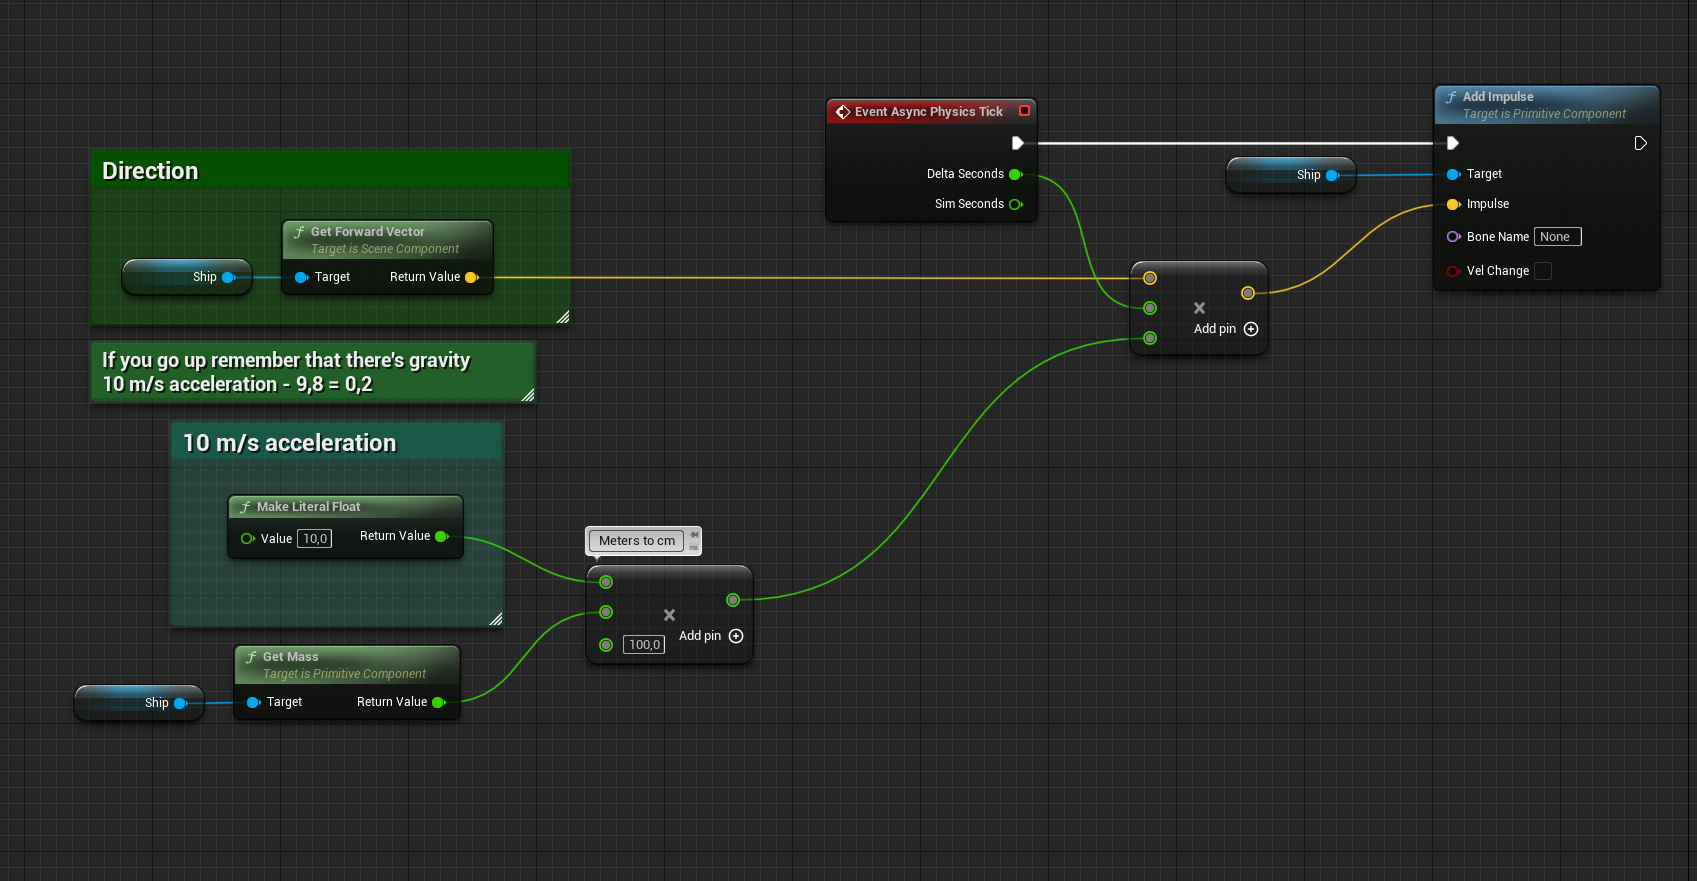
Some of the functions only work in main thread, like get component location or rotation, this can result in stuttering because values are updated in other tick. It’s best to build your own functions which gets the values from the physics rigidbody.
Do i need interpolation?
No you don’t, but you need to read Linear and Angular Velocity from Physics Thread Api, and store them in your class as private members and share with Getter functions for widgets.
If you try to calculate acceleration values with Game Thread Api Velocity parameters (while using Async Physics Tick) they will generate unstable and unreadable values. Unless you are inputting velocity in Game Thread Physics Api.
Acceleration (m/s) values need to be calculated inside Async Physics Tick as well and store privately and share with Getters.
Network Physics Setup
If you want to replicate custom, predicted physics in Unreal Engine using modern Chaos mechanics, you need two core classes:
- UMyPhysicsMovementComponent (Your custom class inheriting from UPawnMovementComponent or UMovementComponent)
- UNetworkPhysicsComponent
Don’t reinvent the wheel. I highly recommend copying the architectural strategy and core code patterns of the engine’s built-in UChaosVehicleMovementComponent. Trying to write a predicted physics movement system from absolute scratch is a nightmare.
Instead, create a component similar to a CharacterMovementComponent, but explicitly tailored for physics. You should route all gameplay forces—such as your custom AddForce, AddImpulse, or SetVelocity functions—through UMyPhysicsMovementComponent rather than calling them directly on the raw UPrimitiveComponent.
Why build it this way?
- AsyncPhysicsTick Integration: This abstraction isolates your gameplay logic, enabling you to cleanly execute logic inside AsyncPhysicsTick on the physics thread while skipping the game-thread overhead and standard limitations of a raw UPrimitiveComponent.
- Clean Network Binding: It allows you to utilize UNetworkPhysicsComponent seamlessly. By initializing it properly as a default subobject, you can pass your custom inputs and state structs right into its historical rollback buffer via CreateDataHistory().
The Physics Lifecycle
Unreal uses an internal network physics management ecosystem. When an Actor sets up its physical bodies, it executes lifecycle functions like OnCreatePhysicsState, OnDestroyPhysicsState, and ShouldCreatePhysicsState inside the movement component. These functions are critical because they dictate exactly when the physics engine creates the asynchronous simulation states, providing you with the exact window needed to bind your movement component to the UNetworkPhysicsComponent data arrays.
Follow this tutorial to create your own movement component: How to Build a Simple Physics Based Movement Component for your Unreal Engine Games (1/2)
Planes
Short notice. If you want Lift Based movement for your plane and you use AddForce or AddImpulse these functions will sabotage velocity vector every time the plane makes a turn.
Scene
We disable gravity and drag. Switch atmospheric lift to constant lift – actually we don’t need any kind of lift because there is no gravity, so basically the plane goes where you aim at this state. We fly to a speed of 300 m/s and turn engines off. Now we should have a pure arcade flying plane that will fly eternally – it’s not. If we turn 40 degrees right, velocity is not the same after turn as it was before turn.
- Before turn 300 m/s.
- After turn 294 m/s.
Remember, there’s no drag or gravity so nothing should affect it.
For Lift Gliding feature you should use the override method SetPhysicsLinearVelocity. You can apply basic Lift in AddForce.
You can do it like this:
double Alpha = 0.0; // glide turn ratio or power (0 - 1) hookup lift force into this
FVector YourGlideDirection = FVector(0.0, 1.0, 0.0).GetSafeNormal(); // normalized vector
const FVector OriginalVelocity = Plane->GetPhysicsLinearVelocity();

// rotates velocity vector
FVector NewSlerpedVector = UKismetMathLibrary::Vector_SlerpVectorToDirection(OriginalVelocity, YourGlideDirection, Alpha * DeltaTime);

// forces velocity vector to maintain it's original length at low framerates
NewSlerpedVector = NewSlerpedVector.GetSafeNormal() * OriginalVelocity.Length();

Plane->SetPhysicsLinearVelocity(NewSlerpedVector); // apply
Recommended Applying Order (Tick group: TG_PostPhysics):
- Thrust // AddForce
- Gravity // AddForce
- Drag // AddForce
- Lift // AddForce
- Lift Glide // SetVelocity
Put the ship in TG_DuringPhysics (root component) and Actor in TG_PrePhysics .
That’s it!
Check out Network Prediction Plugin Network Prediction: Replication’s Crystal Ball | Unreal Fest Bali 2025
And Best Practices for Networked Movement Abilities | Unreal Fest Bali 2025
Check out these Unreal Classes for more:
UChaosVehicleMovementComponent | Unreal Engine Documentation | Epic Developer Community
UChaosVehicleSimulation | Unreal Engine Documentation | Epic Developer Community
UChaosWheeledVehicleMovementComponent | Unreal Engine Documentation | Epic Developer Community
UCharacterTrajectoryComponent | Unreal Engine Documentation | Epic Developer Community
Classes | Unreal Engine Documentation | Epic Developer Community
Check out the Mover Plugin, there’s good info about physics & async tick in there: